
.png)
.png)
1. Unpacking your eColor+ s2 24in
.png)
Assembling the Stand:
1. Remove all pieces of orange tape attached to parts.
2. Check that the locks on all 4 casters (2 each on stand leg L and stand leg R) are engaged.
3. Place stand leg L and stand leg R so that the rods (A) are facing up and towards you.
4. Stand up stand leg L and stand leg R and insert the stand stay with the side labeled L in the groove on stand leg
L and the side labeled R in the groove on stand leg R as far as it will go. Be careful not to get your fingers stuck in the groove between the stand stay and the stand leg.
_edited_edited.jpg)
5. Secure the stand stay to the stand legs by tightening the 4 hex nuts (A)using the M10 end of the wrench.
6. Attach the accessory pocket with 1 M4 hex screw using the allen wrench.
Attaching the Basket:
1. Check which type of stand leg is used with the product. Hold part (A) of the basket with "L" to the left and "R" to the right, and lower it so that part (D) rests on part (E) of the stand. The lower part of the basket should rest against the rod (F) on the inside of the stand.
2. Use the allen wrench to firmly tighten the right and left M4 hex screws.
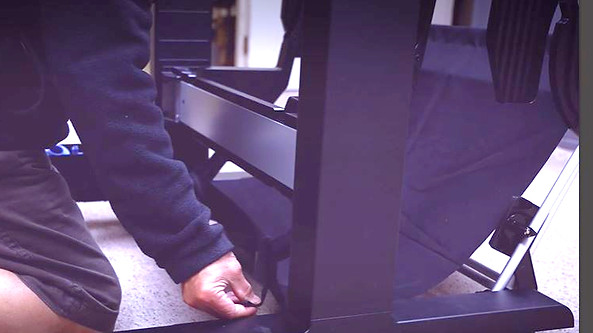
3. Place one of the paper guides over the stand stay, and insert the protrusion (A) on the paper guide into the hole (B) on the stand stay until you hear a click.
4. Install the remaining paper guides on the stand stay in the same way.
5. Insert part (A) of the adjustable stopper into the hole (B) in the paper guide and push part (C) until it clicks into place.
6. Store the adjustable stopper in the paper guide.
7. Spread out the basket cloth until you can see the white tags (A).
8. Insert the support rod (A) into the support rod holder (B).
9. Place the basket cloth over the support rod.
10. Move to the rear of the stand. Hang the string loops on the left and right of the basket cloth over the hooks on the stand.
11. Hang the string loops on the rear over the paper guide hooks. There are 3 locations for string loops on the SD-32 and 2 locations on the SD-23.

2. Building the Stand
.png)
Components if you purchased our Design Station Laptop:
-
Paper Roll(s) (Separate Box)
-
Scanner / Cord
-
Case with Poster Artist Disks (Label inside with license key)
-
Laptop / Charger
-
USB Extender
-
USB Cord
-
Red Information Folder with Printer Labels
Components if you did not purchase our Design Station Laptop:
-
Paper Roll(s) (Separate Box)
-
Scanner / Cord
-
Case with Poster Artist Disks (Label inside with license key)
-
USB Cord
-
Red Information Folder with Printer Labels
3. Unpacking Additional Components
(Shipped via UPS)
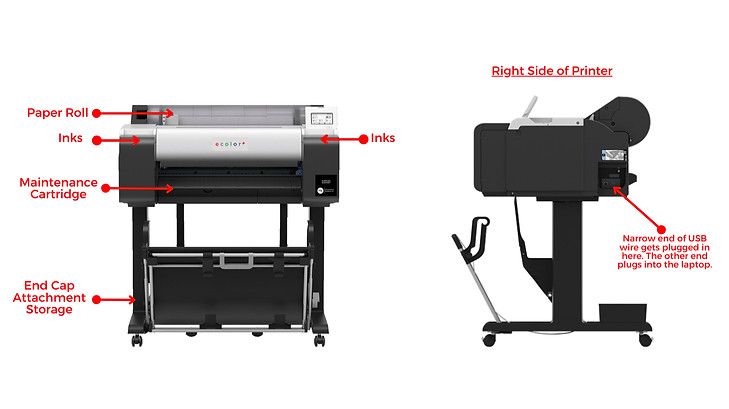
On the Printer:
-
There are indentations under the printer on each side so it can be lifted by 2 people and placed onto the stand.
-
After placing the printer on the stand, remove all tape (including the tape holding in the paper roller from the back of the printer) and put on all of the labels.

-
Plug in the power cord and turn on your eColor Poster printer as soon as possible.
-
Choose English and Time Zone.
Inks:
1. Unwrap the ink cartridges and put them into the designated slots (place the cartridge in the slot with the shorter side facing you and when you close the blue lever it will push the ink into place).
2. Hit okay when it tells you that the inks are being loaded.
*At this point in time the printer will prompt you through the rest of the steps.
_edited.jpg)
Printhead:
1. Open the top cover of the printer, you will see the print head carriage on the left hand side on the inside. This part is very delicate. Carefully open one blue lever towards you and the other one away from you.
2. Hold the printhead by the sides and remove the orange covers. Do not touch the sides that were covered by the orange pieces. Gently place the printhead in with the words facing you. Make sure it is seated all the way into the carriage.
3. Close the lever that is away from you first and then the one that opened towards you.
4. Close the top cover and the printer will automatically complete the printhead installation process


Paper:
1. Install the paper. Place the roll of paper on the metal bar so that when it is loaded it goes over the roll and into the printer and is flush with the right side end cap. Make sure the end cap is securely fastened on to the left end of the roll and lock the blue tab.
2. Place the roller into the printer.
3. It will ask the type of paper so choose Canon Matte Coated Paper 170gsm under the Coated Category on the list.
4. Make sure you select ROLL PAPER when it asks.
5. Now the printer will configure the print head and ink. This will take about 10 minutes.
*The Maintenance Cartridge is already in the printer.
Disable Auto-Shut Off Required):
1. Select the gear icon on the bottom of the screen (Settings)
2. Select PRINTER SETTINGS
3. Select OTHER PRINTER SETTINGS
4. Select ENERGY SAVING SETTINGS
5. Select AUTO POWER OFF and change it to OFF
*The printer must be plugged in and powered on at ALL TIMES.
This allows it to run necessary maintenance cycles.
4. Preparing the Printer
5. Preparing your Computer
Skip this step if you purchased our Design Station Laptop.
Place the labels on your printer as shown in the diagram.
.png)
Downloading the Printer Driver on the Designated Laptop:
1. Make sure the printer is plugged into the laptop with the USB cord.
2. Click here to automatically start the printer driver download.
3. Go to your Downloads folder and double click the printer driver file to open it.
*You may need an Administrator Password to move forward from here!
4. When downloading the Printer Driver, you will choose the TM255 option and USB connection.
Installing the Poster Artist Design Software:
*The Poster Artist Software is not compatible with MACs. You can access the online version at posterartist.canon This will be covered in the training as well.
1. To download Poster Artist (Poster Designing Software) on the computer that you will be using with the printer, click here.
2. Follow the prompts to complete the installation. You will need to use the license number that is inside the Poster Artist Disk Case on the small white label.
*To Download Poster Artist Lite (using a second computer) or Direct Print Plus (PDF Printing Software), visit the Downloads Section of our Resource Center.
Installing the Poster Artist Templates:
The Poster Artist Templates will be shared as a Google Drive File. You can download
these after you download Poster Artist and have everything else set up.
* Make sure Zoom is installed on the device that you will be using for the online training.

1. Unbox the scanner and plug into the laptop. (Make sure it is unlocked by checking the switch on the bottom of the scanner).